Iris photography is one of those portrait styles that instantly feels futuristic. Your eye becomes an artwork, packed with details you barely notice in real life. But it’s also a craft where tiny mistakes in focus, pose, or reflections can ruin the shot. In this blog, you’ll get the exact step by step setup to capture consistently sharp, high detail iris images using a ring flash and a macro lens.
Why iris photography is tricky
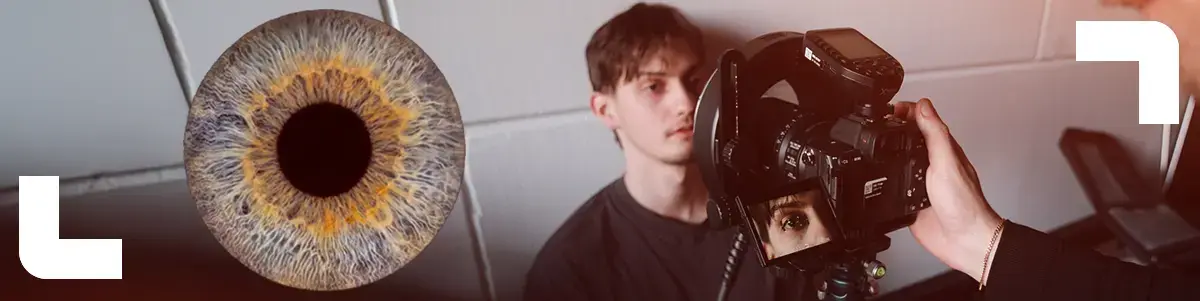
The iris is small, glossy, and it moves with the tiniest shifts in breathing. On top of that, depth of field is razor thin. And reflections are always present, so controlling them is key. The goal is simple: maximum iris texture, minimum distractions.
Step 1: lock the subject in place
Have your model sit on the floor with their back and head against a wall.
Why this works:
- Super stable, no leaning forward or back
- Manual focus becomes much easier
- Consistent distance to camera and flash
Tip: ask them to drop their shoulders and breathe calmly. Less tension means less micro movement.
Step 2: tripod at eye level
Mount your camera on a tripod and frame at eye level. Keep the sensor plane as parallel to the iris as possible.
Why it matters:
- If you shoot at an angle, parts of the iris will fall out of focus
- It’s easier to place focus on the exact plane you need
- Your framing stays consistent, great for shooting multiple eyes
Step 3: control the ring flash reflection
A ring flash gives you that clean circular catchlight, but you want it inside the pupil, not spilling over the iris.
How to nail it:
- Move the camera back until the ring reflection sits fully inside the pupil
- If you’re too close, the reflection covers the iris and kills detail
- When it’s inside the pupil, it’s very easy to clean up in post
This is the sweet spot. Take your time here, it makes the final image look instantly cleaner.
Step 4: manual focus on iris texture
Use manual focus and focus on the iris texture, not the lashes.
Workflow:
- Zoom in on your display or use focus magnification
- Take a few test frames
- Micro adjust until the texture looks razor sharp
Pro tip: have your model fix their gaze on a single point and count down, so the eye stays as still as possible.
Step 5: baseline settings that work in most cases
Start with these settings:
- Shutter speed: minimum 1/160
- Aperture: F8
- ISO: 100
Why this combo works:
- 1/160 helps freeze tiny movement
- F8 gives enough depth for more of the iris to stay sharp
- ISO 100 keeps the file clean and noise free
Then adjust flash power until exposure looks right. It’s better to control exposure with flash output than by raising ISO.
Step 6: make the pupil smaller for more iris detail
You want to reveal as much iris as possible. A large pupil hides texture, so shrinking it helps a lot.
The trick:
- Fire a few flashes in a row
- Repeated bursts cause the pupil to constrict
- You’ll literally see more pattern and color appear in the iris
Keep it comfortable. It’s bright, so communicate clearly and give your model short breaks if needed.
Step 7: shoot the keeper
Once the pupil is small and focus is locked:
- shoot a short burst
- pick the sharpest frame afterward
No need to spray and pray. A few strong frames are enough when your setup is dialed in.
Quick post processing notes
In editing, your goal is usually:
- remove or soften the ring reflection if it’s in the pupil
- boost contrast and micro contrast to make texture pop
- fine tune color without pushing it into an unnatural look
If your setup is solid, post is mostly polishing, not rescuing.
Gear we used
For this setup:
- Sony FE 100mm F2.8 Macro GM OSS
- Godox R1200 Ring flash for AD1200Pro
- Godox AD1200 Pro 1200Ws TTL Portable Flash (Bowens mount)
Why this combo works so well:
- 100mm macro gives comfortable working distance and insane detail
- ring flash delivers clean, symmetrical light and a signature look
- 1200Ws gives power and consistency, even at F8 and ISO 100
Quick shoot checklist
- Subject seated on the floor, head against the wall
- Camera on tripod, eye level, sensor plane parallel
- Ring reflection inside the pupil, not on the iris
- Manual focus on iris texture
- 1/160, F8, ISO 100
- Fire a few flashes to shrink the pupil
- Short burst, pick the sharpest frame